
Screen Language #7 - GUI Coding #1
Main Menu, the imagemap statement, Image Location Picker
What is GUI? GUI stands for Graphical User Interface, and it covers everything that we see and interact with. This means all of the menus, be it the essential ones (like the Main Menu or the Save and Load screens) or custom ones (like Inventory or CG Gallery), it means the dialogue box with name and dialogue text, it means... Well, pretty much anything in Ren'Py, really.
Originally, I wanted to make GUI Coding into a standalone series of tutorials, but I realized two things.
- I believe everyone should understand their code, at least to an extent. Thus, I explain how everything works, and it's possible you won't be able to understand all of it without having seen the other Screen Language tutorials.
- The assets that I'll be using for this series are made for imagemaps, which we haven't talked about yet.
It's a great opportunity to see theory in practice. Today, we'll be changing the Main Menu, and next time, we can focus on the dialogue box.
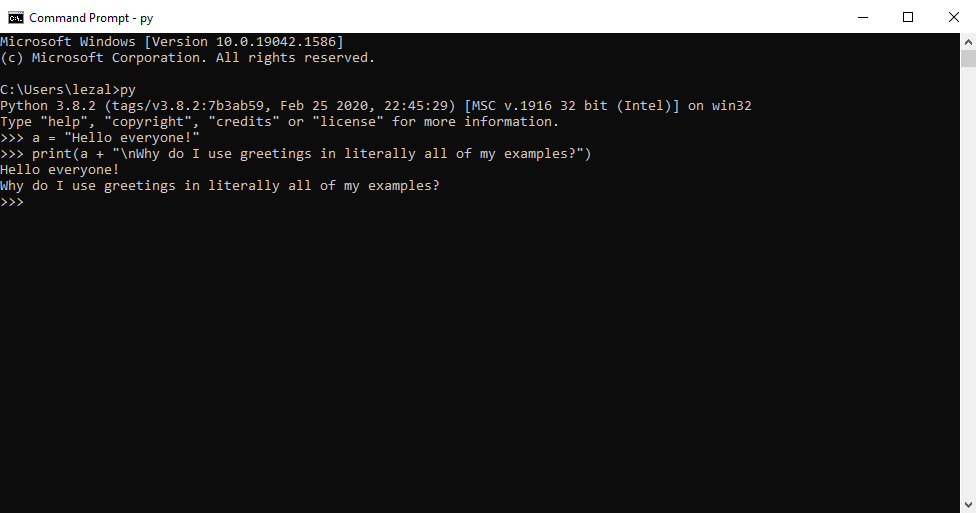
In more technical terms, GUI represents program's windows, buttons, scrollable pages and similar things that you can click. If you want an example of a program without a GUI, you don't have to go looking further than the terminal, found on all of Windows, Mac and Linux (Windows one shown below).
I've found a very pretty GUI assets that are available for free on itch.io, named Pleasant Afternoon, which are reasonably simple, making them great for a tutorial. It's made by LunaLucid, and credit where credit is due, I would like to include two of her links here:
LunaLucid has been amazing enough to let me rearrange her files for the purpose of my tutorials, on the Pleasant Afternoon Page. Before it gets posted there, I'll have it right here, too. Grab it and throw the contents into the game folder of the project.
For starters, let's see how the Main Menu looks in a fresh Ren'Py project.
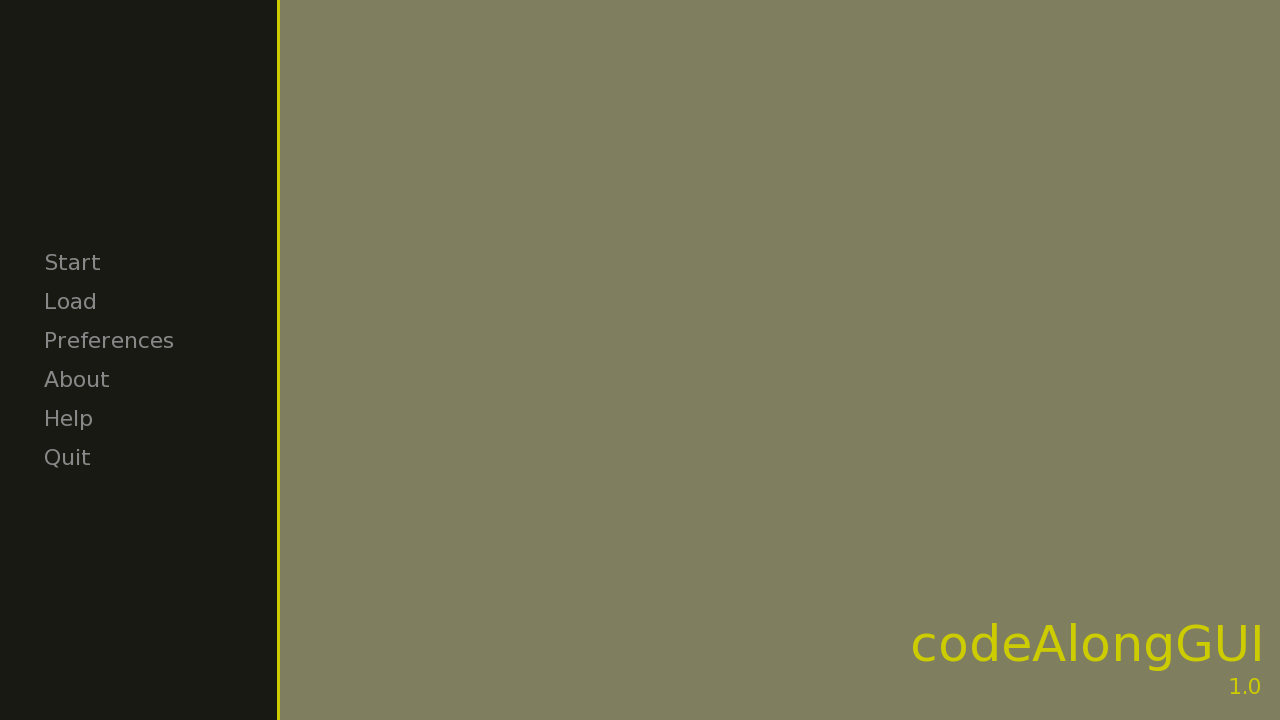
Let's grab the code for it. It's located in the screens.rpy file, in the current Ren'Py version (7.4.10 at the time of writing this) on the line 349. We'll cut it out of the screens.rpy and separate it into it's own file that we create, main_menu.rpy.
Not only we're grabbing the Main Menu screen code, we'll also grab the associated style statements. This should be the entirety of it:
## Main Menu screen ############################################################
##
## Used to display the main menu when Ren'Py starts.
##
## https://www.renpy.org/doc/html/screen_special.html#main-menu
screen main_menu():
## This ensures that any other menu screen is replaced.
tag menu
add gui.main_menu_background
## This empty frame darkens the main menu.
frame:
style "main_menu_frame"
## The use statement includes another screen inside this one. The actual
## contents of the main menu are in the navigation screen.
use navigation
if gui.show_name:
vbox:
style "main_menu_vbox"
text "[config.name!t]":
style "main_menu_title"
text "[config.version]":
style "main_menu_version"
style main_menu_frame is empty
style main_menu_vbox is vbox
style main_menu_text is gui_text
style main_menu_title is main_menu_text
style main_menu_version is main_menu_text
style main_menu_frame:
xsize 280
yfill True
background "gui/overlay/main_menu.png"
style main_menu_vbox:
xalign 1.0
xoffset -20
xmaximum 800
yalign 1.0
yoffset -20
style main_menu_text:
properties gui.text_properties("main_menu", accent=True)
style main_menu_title:
properties gui.text_properties("title")
style main_menu_version:
properties gui.text_properties("version")Once we have it separated, we can start cutting off the things that we won't need for our new GUI. First, I'll get rid of the giant comment on top (mainly so that I don't have to include it in every code block), then of the style statements below.
Let's do that now. I'll split the "cutting off" into two parts, so that I can explain two more things.
Do note that this code results in an error, since two styles that we've deleted are still referenced in the screen.
## Main Menu screen
screen main_menu():
## This ensures that any other menu screen is replaced.
tag menu
add gui.main_menu_background
## This empty frame darkens the main menu.
frame:
style "main_menu_frame"
## The use statement includes another screen inside this one. The actual
## contents of the main menu are in the navigation screen.
use navigation
if gui.show_name:
vbox:
style "main_menu_vbox"
text "[config.name!t]":
style "main_menu_title"
text "[config.version]":
style "main_menu_version"
style main_menu_text is gui_text
style main_menu_text:
properties gui.text_properties("main_menu", accent=True)What do the default styles do, anyway? They import most of the settings written in the gui.rpy file. If we were to use text in the Main Menu, it would be worth keeping the main_menu_text style - like I've done here - and change settings there. As I'm not planning on using text nor textbutton statements, I won't be keeping it.
I'd also like to debunk the screen code, since by now, you should be able to understand it no problem - especially since there are the original comments included.
- add gui.main_menu_background adds the default background image. The variable can be found in gui.rpy.
- the frame has an innacurate comment. It is the black frame with yellow edge on the left, below the navigation.
- Speaking of navigation, it is one of the default Ren'Py screens and holds the menu buttons. It is added onto the Main Menu with the use statement.
- Then, depending on the show_name setting in gui.rpy, two more text statements can be shown - the title of the project and it's version, both settings found in options.rpy.
We haven't talked about the style statement yet (Ohhh, that would actually be a great topic for Screen Language Part #8!), but if you want to quickly debunk it:
- styles hold properties and can be used by screen statements.
- style main_menu_text is gui_text prepares main_menu_text with all the properties the gui_text style has - which is the main default text style.
- the gui.text_properties function then imports the main menu text specific settings, once again found in gui.rpy.
Honestly, you can get surprisingly far with just changing the values and images in the gui.rpy file, but I've always preferred to code screens from scratch like we're doing now.
Anyway, to finish cutting off the unnecessary code...
## Main Menu screen
screen main_menu():
## This ensures that any other menu screen is replaced.
tag menu
add NoneThat's it. That's all we're keeping. Most code deleted and the add statement given None rather than the default background image. This results in literally just a black screen.

Now that we have a blank canvas, we can start shaping it to the image of our own. One thing to mention before we begin is that all the images have the resolution of 1280x720, which is also the resolution of our project. This is extremely nice - I shouldn't have to worry about resizing or positioning of the images at all.
I've created some more folders. In the game folder, I've created the afternoonGui folder which will hold all the assets in this series. Inside that, the main_menu folder that holds all the assets used by the Main Menu.
Finally, into that folder, I've copied the background.png image from the Pleasant Afternoon .zip.
With the image in place, I can add it as the background by changing the add statement once again.
## Main Menu screen
screen main_menu():
## This ensures that any other menu screen is replaced.
tag menu
add "afternoonGui/main_menu/background.png"The background is in place. Now, the buttons. There are essentially two ways how to code buttons in screens.
- If every button is in a separate image, we use imagebutton statements to add them one by one.
- If all the buttons are in a single image, we use the imagemap statement that adds all the buttons at once.
Latter is the case with Pleasant Afternoon. I'll now prepare some code, and we'll go through the process of adjusting the values. But of course, I'll explain everything first!
## Main Menu screen
screen main_menu():
## This ensures that any other menu screen is replaced.
tag menu
add "afternoonGui/main_menu/background.png"
imagemap:
ground "afternoonGui/main_menu/ground.png"
hotspot (0, 0, 0, 0):
action NullAction()
hotspot (0, 0, 0, 0):
action NullAction()
hotspot (0, 0, 0, 0):
action NullAction()
hotspot (0, 0, 0, 0):
action NullAction()After we write the imagemap statement, we write a colon. You should know by now that this means a block follows.
There is one property the imagemap has to have, and that is the ground property. ground is the image with buttons that will always be displayed. imagemap does also have the idle property, but without going into details, more often than not, giving the image of idle versions of the buttons to the ground property suffices just fine.
For the ground, we're using the ground.png image from the assets.
Afterwards, imagemap can take multiple hotspot statements. hotspots represent the areas that can be clicked, and/or hovered and/or selected. This area is specified by the four numbers inside parentheses, properly called a tuple. The four numbers represent, in this order:
- x position of the top-left corner of the area.
- y position of the top-left corner of the area.
- width of the area.
- heigth of the area.
After these four are set (which I've all set to 0 for now), we can include the action property (optionally in a block, like I have), to specify what happens when the area is clicked. In case you've forgotten what happens when the action property isn't included or how NullAction does nothing, you can look back at Screen Language #4+5.
With the imagemap in place, we can take a look at the state of the Main Menu right now.
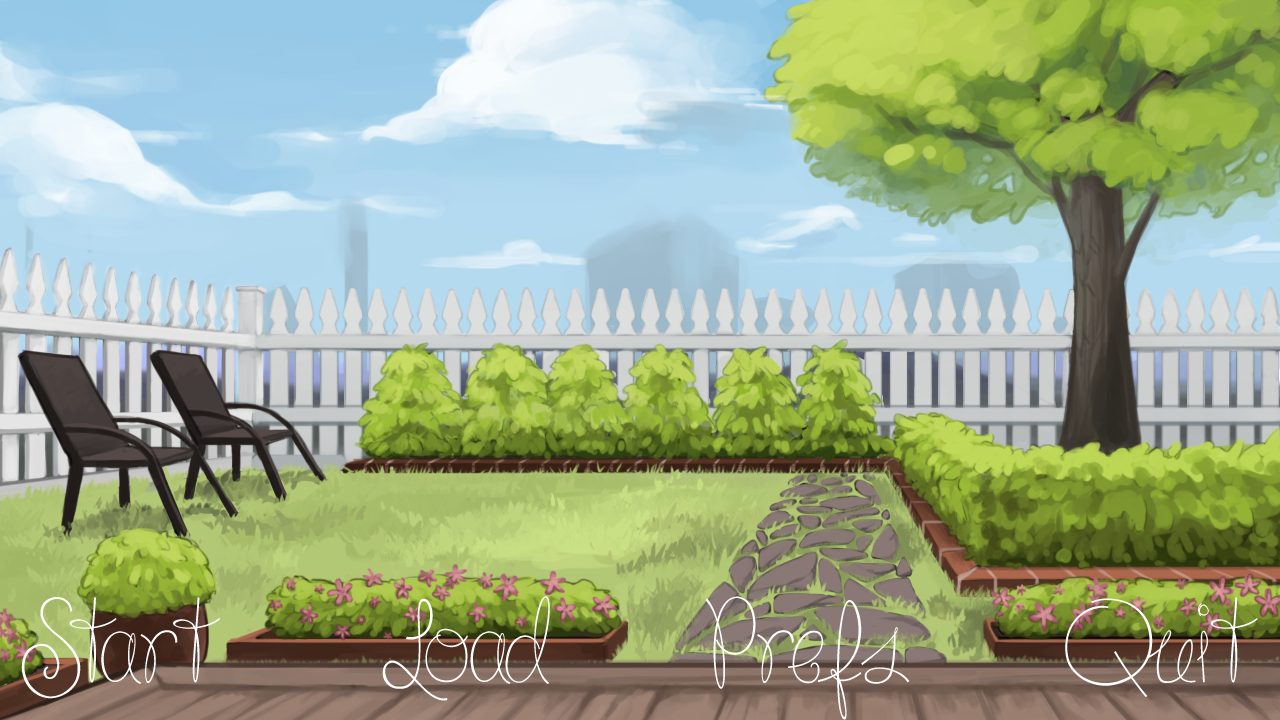
Now, how do we get the areas? We can use an external program or we can use the Image Location Picker inside Ren'Py. First, I'll show you how to do it with an external program, as that's my preferred way.
I love using GIMP. I think it has the perfect balance of powerful but simple - And it is coded in Python, just like Ren'Py!
So, that's what I'm using in my example. But honestly, any editor will do, from Photoshop to MS Paint - trust me, I've done it all.
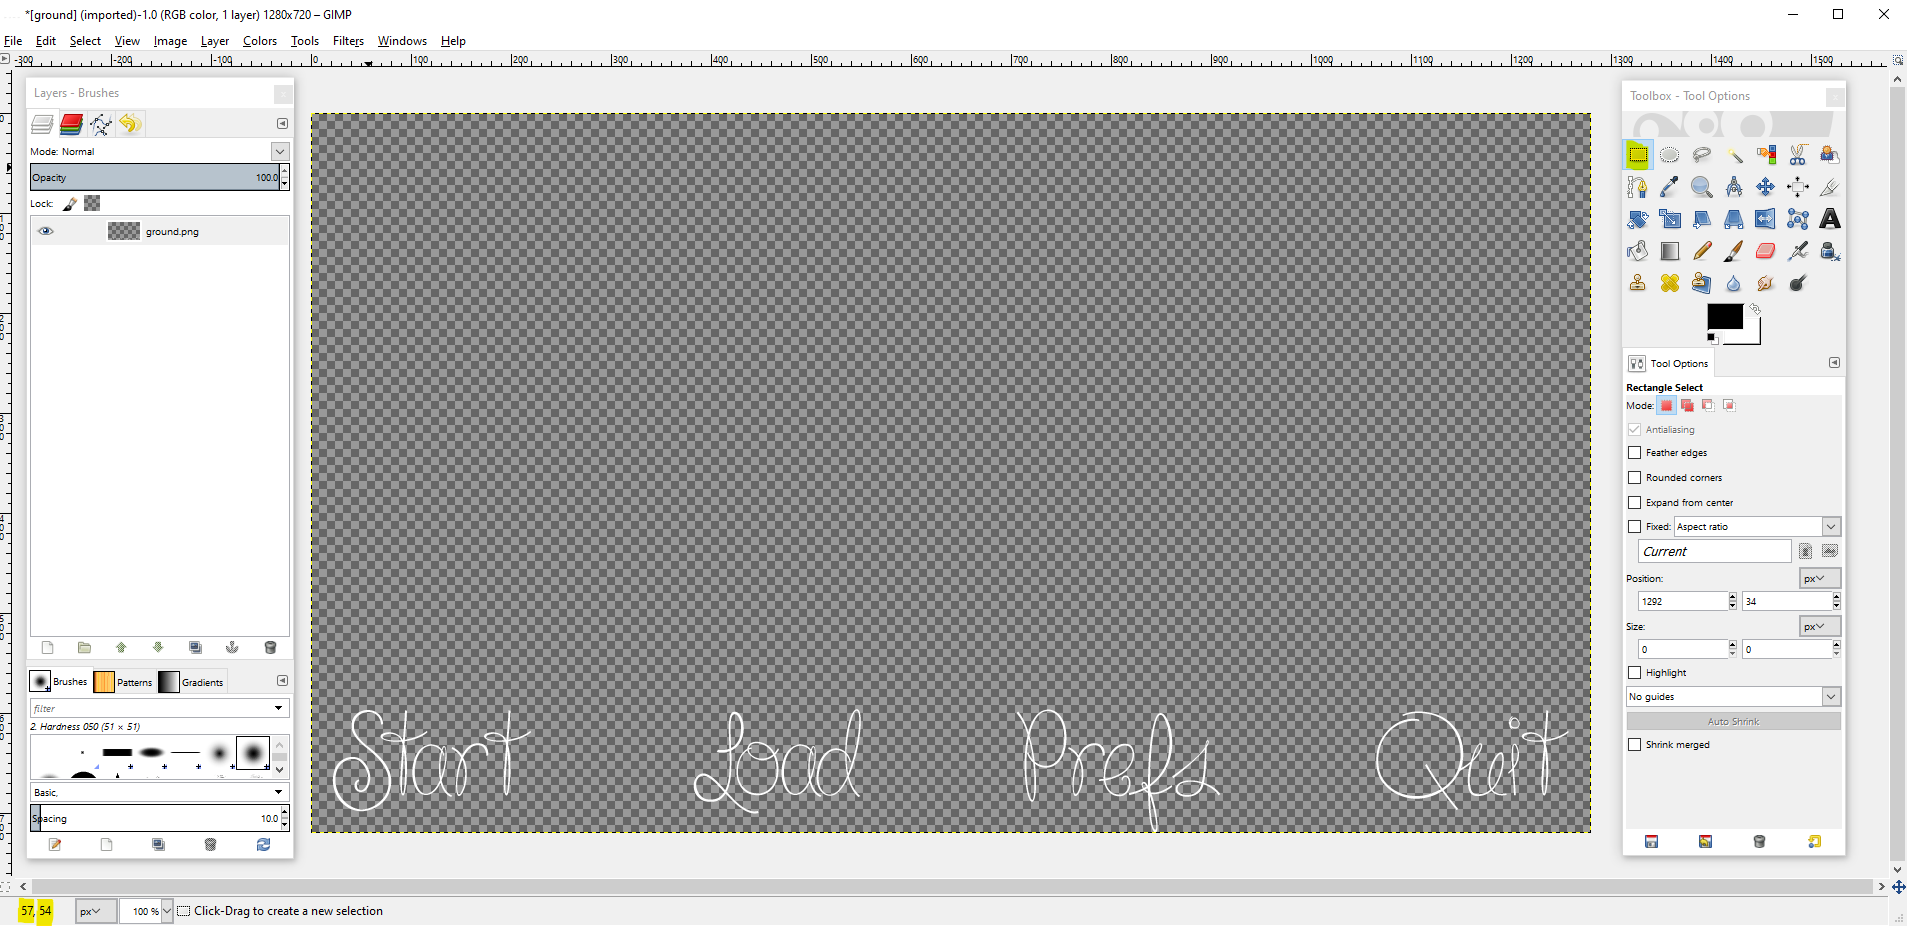
After opening the buttons image in GIMP, grab the Select tool (highlighted top-right). You'll want to select the area of one of the buttons (Let's start with Start, shall we?). Zooming in is useful, and you can use the position of your cursor in bottom-left to orientate yourself a bit - no don't need to note them down for now.
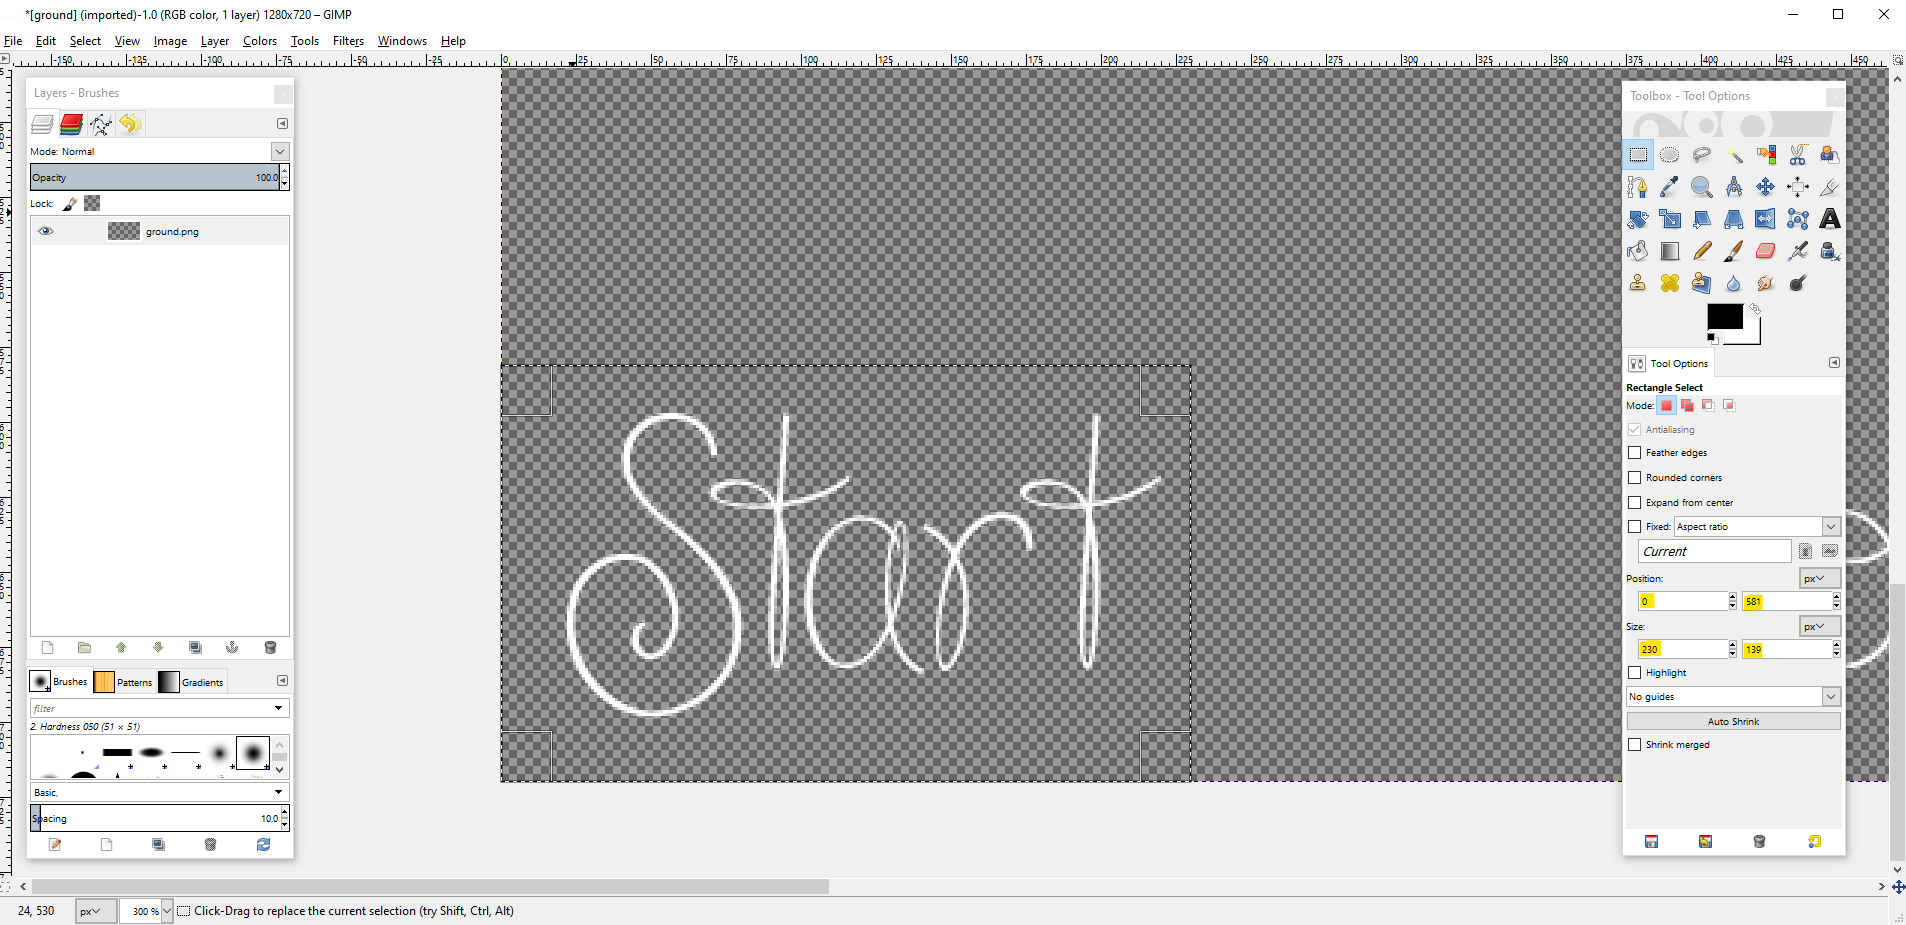
With the area selected, we can now see all of the four numbers that we need on the right side, in the Toolbox tab. They're all highlighted:
- x position is 0px
- y position is 581px
- width is 230px
- height is 139px
If you want to make the selection even easier and more satisfying, there's the Highlight tick box right under the Size - Ticking it will make all the non-selected area darker.
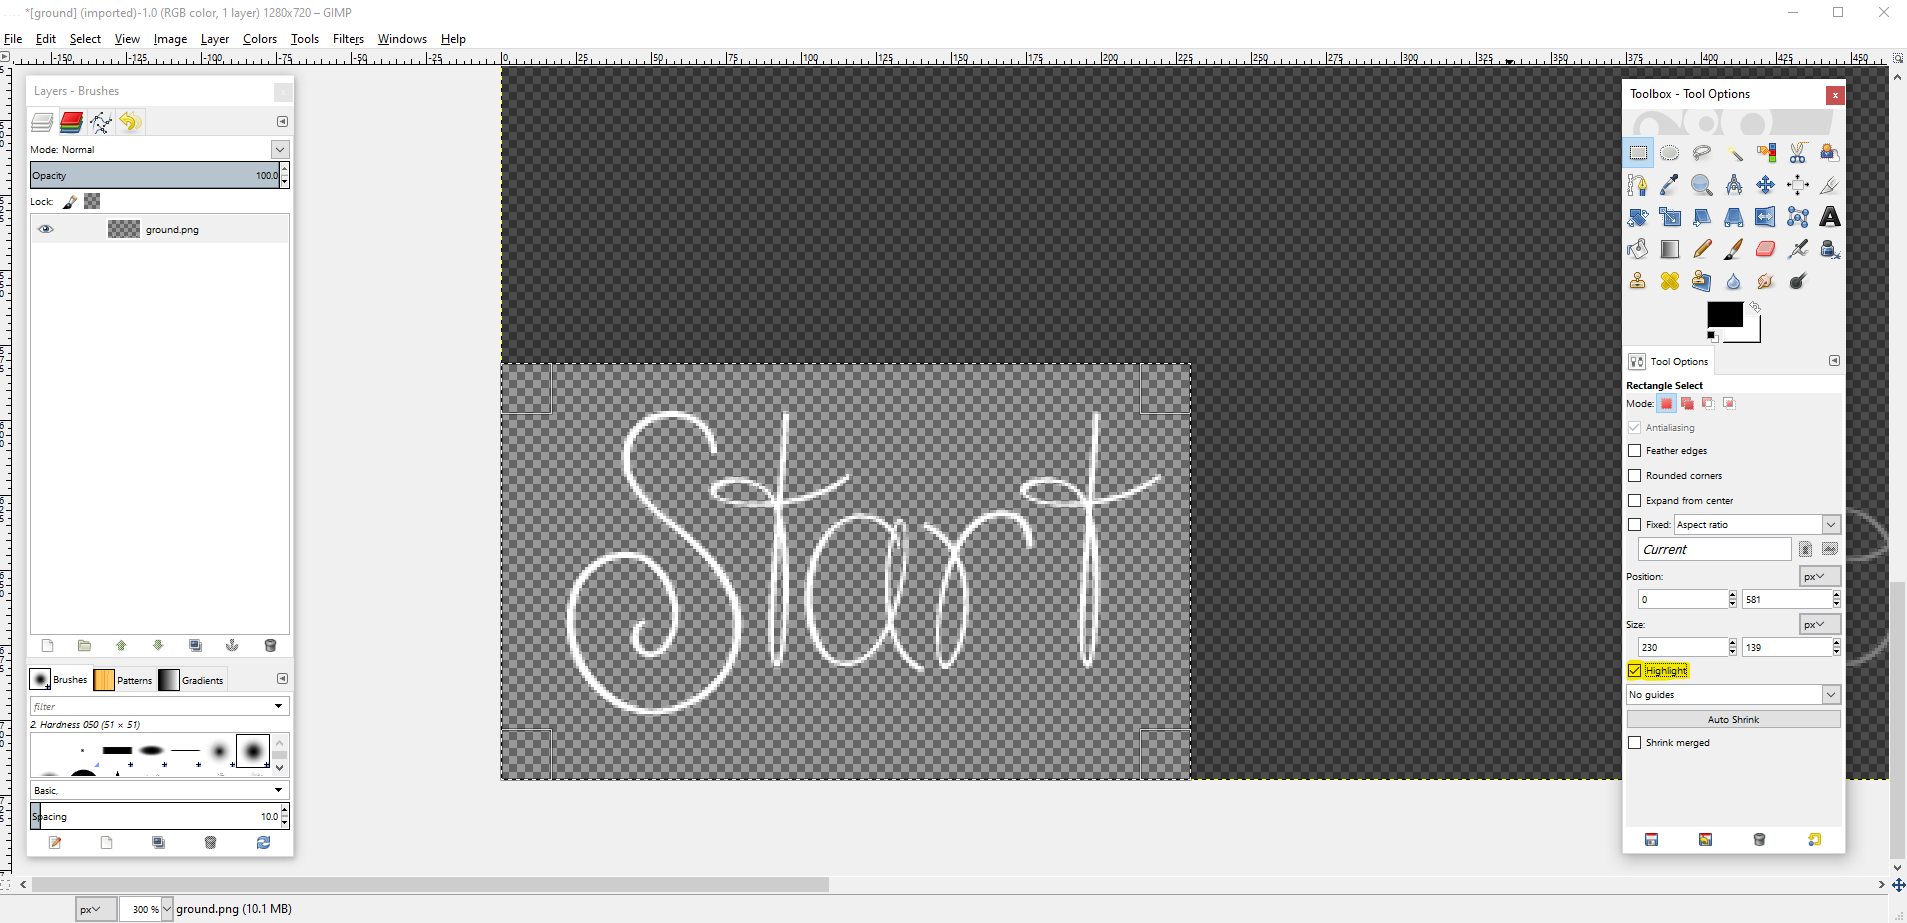
In conclusion, the tuple that we're looking for is (0, 581, 230, 139). Before we move on with the code, let's take a look at the other way of getting the tuple - the built-in Image Location Picker.
The Image Location Picker can be accessed by first bringing up the Developer Menu, which can be entered by pressing Shift + D when the project is launched. Clicking the Image Location Picker button leads to a list of all the image files inside the game folder.
At this point, there shouldn't be that many files so that we can't our afternoonGui/main_menu/ground.png image, but if you're having trouble, you can type something in, like afternoonGui, to filter the list. Find it and click it.
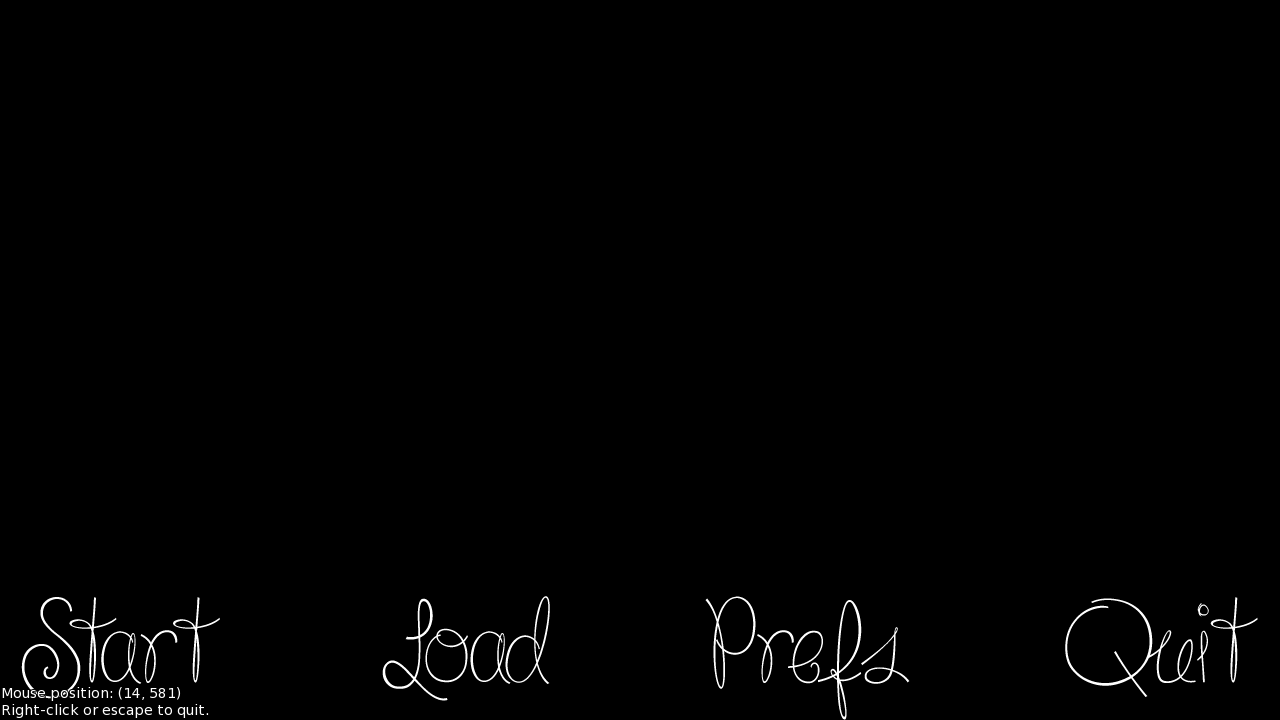
This is what we get - An empty screen with only the image that we've selected. Bottom-left holds the position of our cursor (cursor is not screenshotted, but it's in the top-left corner of Start), as well as a hint how to exit the Picker.
Here's the magic: Clicking and dragging your mouse will let you select a rectangular area. And when you do, the tuple that we need for our hotspot will be copied right into your clipboard, all ready to be Ctrl + V'd into the code.
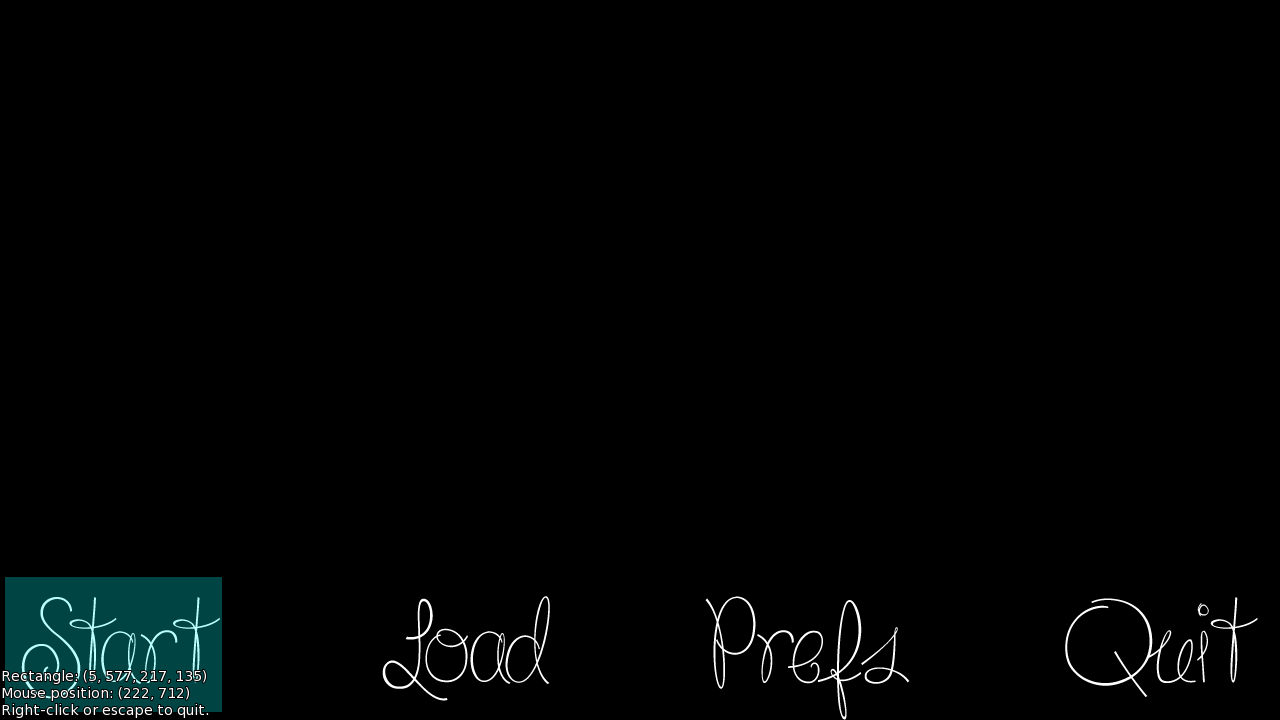
In this case, a tuple of (5, 577, 217, 135) is copied. But I like my GIMP method more, so I'll use the (0, 581, 230, 139) one instead.
With both methods shown, let's get back to the screen code now, and pass the gotten tuple to the first hotspot.
## Main Menu screen
screen main_menu():
## This ensures that any other menu screen is replaced.
tag menu
add "afternoonGui/main_menu/background.png"
imagemap:
ground "afternoonGui/main_menu/ground.png"
hotspot (0, 581, 230, 139):
action Start()
hotspot (0, 0, 0, 0):
action NullAction()
hotspot (0, 0, 0, 0):
action NullAction()
hotspot (0, 0, 0, 0):
action NullAction()With the correct tuple in, we can change the button's action to the correct one - Start. If you were to look up the navigation screen in screens.rpy - which holds all the buttons found on the Main Menu - you'd see that the same action is used by the default Start button as well.
This means, if we start the game now, we'll enter the script at the start label like we normally would, we haven't broken anything.
Let's continue and fill in the correct numbers for the other tuples as well. I'll use GIMP again - and with the buttons of roughly the same size, I can keep the same area for all the hotspots. With that - since all the buttons are at the bottom of the screen - I can also keep the y position the same, and thus all I have to change is the x position.
...And the action, of course.
## Main Menu screen
screen main_menu():
## This ensures that any other menu screen is replaced.
tag menu
add "afternoonGui/main_menu/background.png"
imagemap:
ground "afternoonGui/main_menu/ground.png"
hover "afternoonGui/main_menu/hover.png"
hotspot (0, 581, 230, 139):
action Start()
hotspot (357, 581, 230, 139):
action ShowMenu("load")
hotspot (692, 581, 230, 139):
action ShowMenu("preferences")
hotspot (1052, 581, 230, 139):
action Quit()The other three buttons are now functional - Load to bring up the load screen, Prefs to bring up the preferences screen, and Quit to quit the game. I've given them all appropriate actions - ShowMenu to the first two, and Quit to the third.
All of these are the default actions. This means, we still haven't broken anything. The Main Menu is right about replaced and it stayed completely functional. Isn't that amazing?
Oh, and I should probably mention that I've added the hover property to the imagemap so that all the buttons look different when hovered. It's the hover.png image from the assets in our main_menu folder.
Alright, time for the finishing touches!
## Main Menu screen
screen main_menu():
## This ensures that any other menu screen is replaced.
tag menu
add "afternoonGui/main_menu/background.png"
imagemap:
ground "afternoonGui/main_menu/ground.png"
hover "afternoonGui/main_menu/hover.png"
alpha False
hotspot (0, 581, 230, 139):
action Start()
hotspot (357, 581, 230, 139):
action ShowMenu("load")
hotspot (692, 581, 230, 139):
action ShowMenu("preferences")
hotspot (1052, 581, 230, 139):
action Quit()
add "afternoonGui/main_menu/flower.png"First, we're adding the alpha property to the imagemap with the value of False. Let me explain what that does.
When alpha is True, as it is by default, hotspots are only activated if the mouse is on an opaque part of the image. A great example of this is the Q in Quit - As the inside of the Q is transparent, button does not trigger if the cursor is placed there, even though it's inside the hotspot's area.
This is why we're setting alpha to False - to make sure hotspots activate anytime the cursor enters the area, no matter the transparency of the images.
And I've kept a tiny thing till the very end - Grab the flower.png from the assets and add it to the bottom of the screen code. It's a cute transparent flower image located in the bottom left corner.
And don't worry - even though the flower covers the Start button, it doesn't block it.
And that's it, that's the Main Menu all done and functional! Let's take a look at the result - I've hovered over the Load button too, notice how it's highlighted!
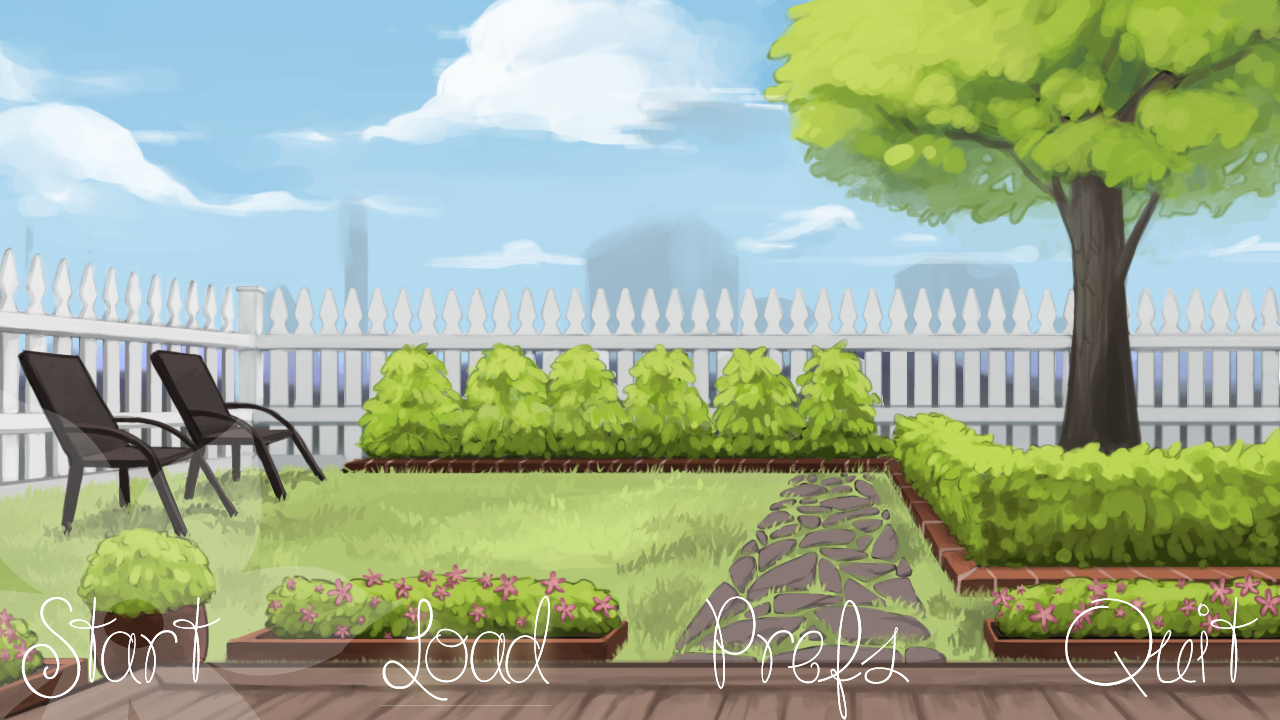
And that's it for this tutorial. I think we're done with learning new statements for the time being, and I'll focus on this GUI Coding - At this point, we know enough to go really far with it.
Alright, for the usual summary:
- What GUI is.
- Where the default main_menu code is and how it looks in it's entirety.
- How the default main_menu functions.
- Stripping main_menu as much as we possibly could.
- Writing the imagemap statement, with the required ground property.
- Writing the hotspot statements and providing them with tuples of four numbers.
- What those four numbers mean - (x pos, y pos, width, height).
- How to get these four numbers - either through an external program like GIMP...
- ...or Ren'Py's Image Location Picker, found in the Developer Menu.
- What the default actions in the main_menu are.
And overall...
- How to make a very nice looking Main Menu.
My my, this has been a lot to take in. I realized that I don't really do short tutorials, do I?
But I believe that they're all packed with useful stuff.
As always, thank you for reading!